
21 min read
The kitchen counter is covered with serving plates, the oven is already working on dinner, and guests are expected to arrive in a few hours. The last thing you need is a complicated dessert that requires constant attention. These simple christmas dessert recipes give you five delicious ways to finish your holiday meal without turning dessert preparation into another stressful project.
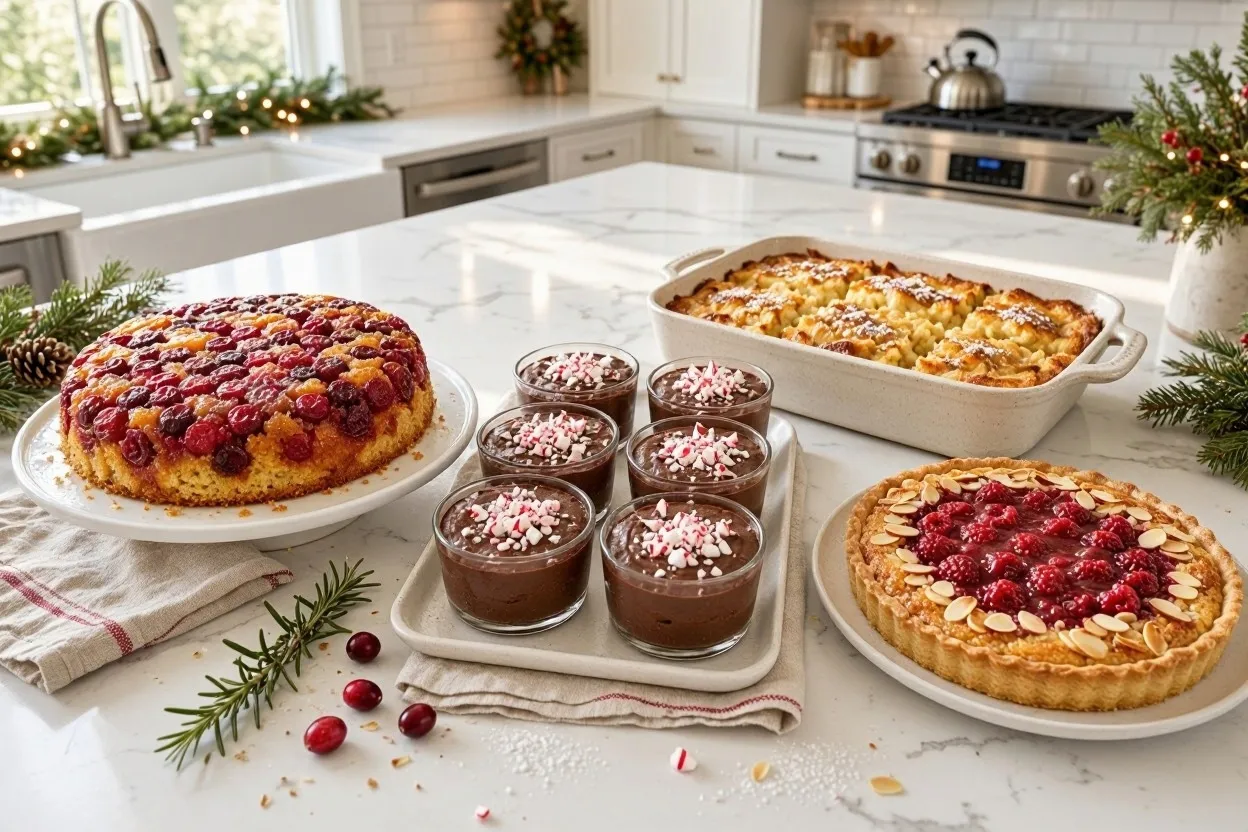
Whether you are looking for simple christmas dessert recipes for a family dinner, a holiday party, or a festive evening with friends, this collection offers something for every occasion. From a glossy cranberry orange cake to creamy chocolate peppermint mousse and warm cinnamon pears, each dessert brings a different flavor and texture to your Christmas table. You’ll also find practical preparation schedules, storage instructions, and serving suggestions to help you choose the right sweets for your gathering.
These simple christmas dessert recipes are designed for home cooks who want festive homemade treats without complicated techniques, expensive ingredients, or hours of preparation. Each recipe includes clear instructions and helpful make-ahead advice. You can choose one dessert for a small family meal or combine several options to create a festive holiday dessert table.
- Quick Look
- Cranberry Orange Upside-Down Cake
- Chocolate Peppermint Mousse Cups
- Cinnamon Baked Pears
- Eggnog Bread Pudding
- Raspberry Almond Tart
- How Much Dessert Do You Need?
- Christmas Dessert Make-Ahead Plan
- Serving and Food Safety
- Food Allergies and Dietary Considerations
- More Recipes You’ll Love
- Simple Christmas Dessert Recipes FAQ
- Final Thoughts
Quick Look: Five Christmas Desserts
Not sure which dessert to prepare first? This quick comparison makes it easier to choose from these simple christmas dessert recipes. Each option offers a different flavor, texture, and preparation schedule. Some are best served warm, while others can be prepared and chilled before guests arrive. Compare the preparation times, serving sizes, and make-ahead options before choosing your holiday menu. If you are short on time, the mousse and baked pears are particularly convenient choices.
| Dessert | Total Time | Servings | Serving Style | Make Ahead | Diet Label |
|---|---|---|---|---|---|
| Cranberry Orange Cake | 1 hour 10 minutes | 10 | Warm or room temperature | Yes | Vegetarian |
| Chocolate Peppermint Mousse | 2 hours 30 minutes | 6 | Cold | Yes | Vegetarian |
| Cinnamon Baked Pears | 45 minutes | 6 | Warm | Partly | Vegan, GF* |
| Eggnog Bread Pudding | 1 hour 10 minutes | 8 | Warm | Yes | Vegetarian |
| Raspberry Almond Tart | 1 hour 55 minutes | 8 | Room temperature | Yes | Vegetarian |
Cranberry Orange Upside-Down Cake
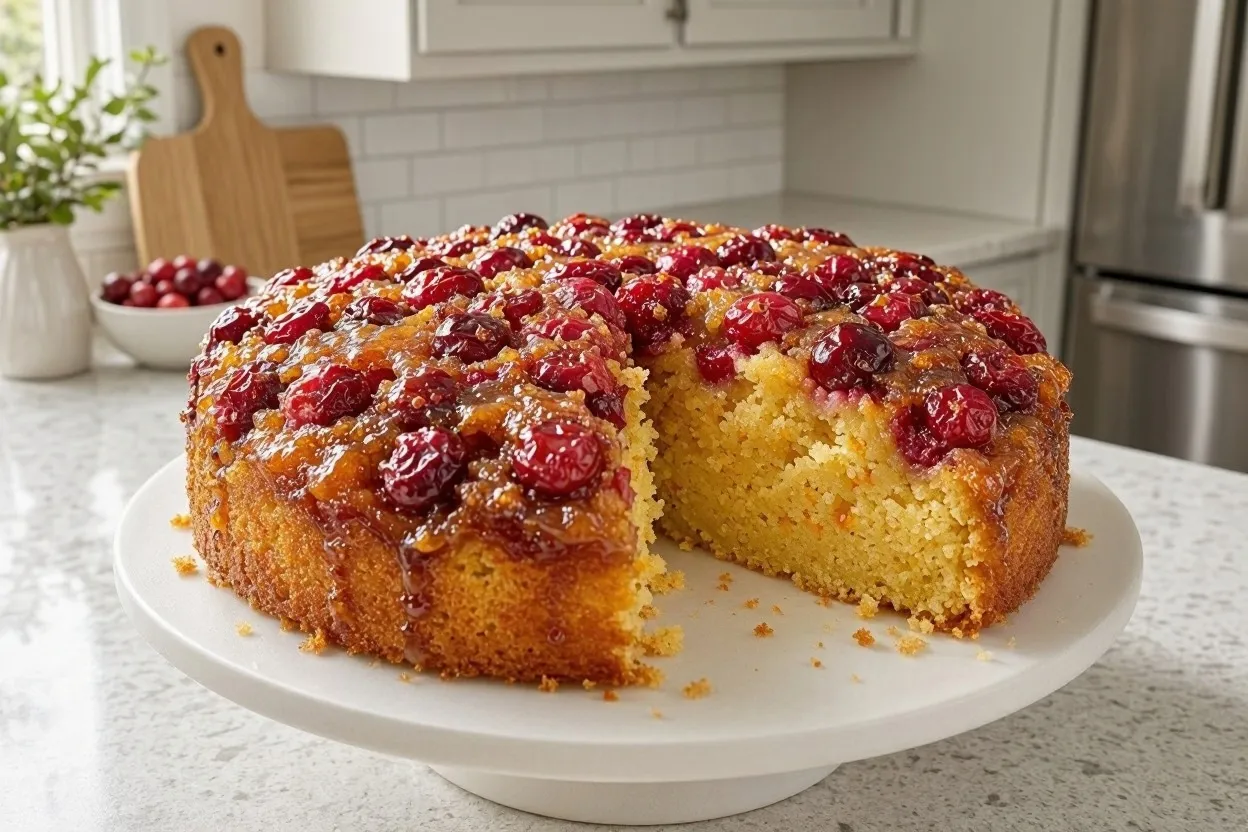
This cranberry orange upside-down cake combines tart fresh cranberries with a buttery brown sugar topping and a tender orange-scented cake. A little sour cream in the batter gives the crumb a soft texture, while fresh orange zest and juice add brightness to every slice.
When you turn it out of the pan, the glossy red fruit creates a beautiful holiday centerpiece without requiring frosting or complicated decorating. It is a lovely choice for serving after Christmas dinner or alongside coffee the next morning. Among these simple christmas dessert recipes, this cranberry cake is especially appealing to anyone who enjoys fruity holiday flavors.
Prep: 20 minutes | Cook: 45–50 minutes | Total: About 1 hour 10 minutes | Servings: 10 | Vegetarian
Ingredients
- For the cranberry topping:
- 3 tablespoons unsalted butter, melted
- 1/2 cup packed light brown sugar
- 1 1/2 cups fresh cranberries, rinsed and thoroughly dried
- 1 teaspoon finely grated orange zest
- For the cake:
- 1 1/2 cups all-purpose flour, spooned and leveled
- 1 1/2 teaspoons baking powder
- 1/4 teaspoon baking soda
- 1/4 teaspoon salt
- 1/2 cup unsalted butter, softened
- 2/3 cup granulated sugar
- 2 large eggs, at room temperature
- 1 tablespoon finely grated orange zest
- 1 teaspoon vanilla extract
- 1/2 cup sour cream, at room temperature
- 1/4 cup fresh orange juice
Instructions
- Preheat the oven to 350°F. Grease a 9-inch round cake pan and line the bottom with a circle of parchment paper.
- Pour the melted butter into the prepared pan. Sprinkle the brown sugar evenly over the butter, then scatter the orange zest across the sugar.
- Arrange the cranberries over the brown sugar in a mostly even layer. Turn any especially large berries cut side down so they sit securely against the topping.
- In a medium bowl, whisk together the flour, baking powder, baking soda, and salt. Set aside.
- In a separate large bowl, beat the softened butter and granulated sugar for 2–3 minutes until pale and fluffy.
- Add the eggs one at a time, mixing well after each addition. Stir in the vanilla and orange zest.
- In a small bowl, combine the sour cream and orange juice. Add the flour mixture to the butter mixture in three additions, alternating with the sour cream mixture in two additions. Begin and finish with the flour. Mix just until no dry streaks remain.
- Carefully spread the batter over the cranberries, smoothing the surface with a spatula without moving the fruit underneath.
- Bake for 45–50 minutes, or until the top is golden and a toothpick inserted into the center of the cake comes out clean or with a few moist crumbs.
- Cool the cake in the pan for 10–12 minutes. Run a thin knife around the edge, place a serving plate over the pan, and carefully invert. Lift away the pan and peel off the parchment paper.
- Let the topping settle for a few minutes before slicing. Serve slightly warm or at room temperature.
Make-Ahead and Storage Tips
Bake the cake up to one day ahead. Cool it completely, cover it, and refrigerate. Store leftovers covered in the refrigerator for up to 4 days. Allow slices to sit briefly at room temperature before serving, or warm them gently in a 300°F oven. Freeze individual slices, well wrapped, for up to 2 months and thaw overnight in the refrigerator.
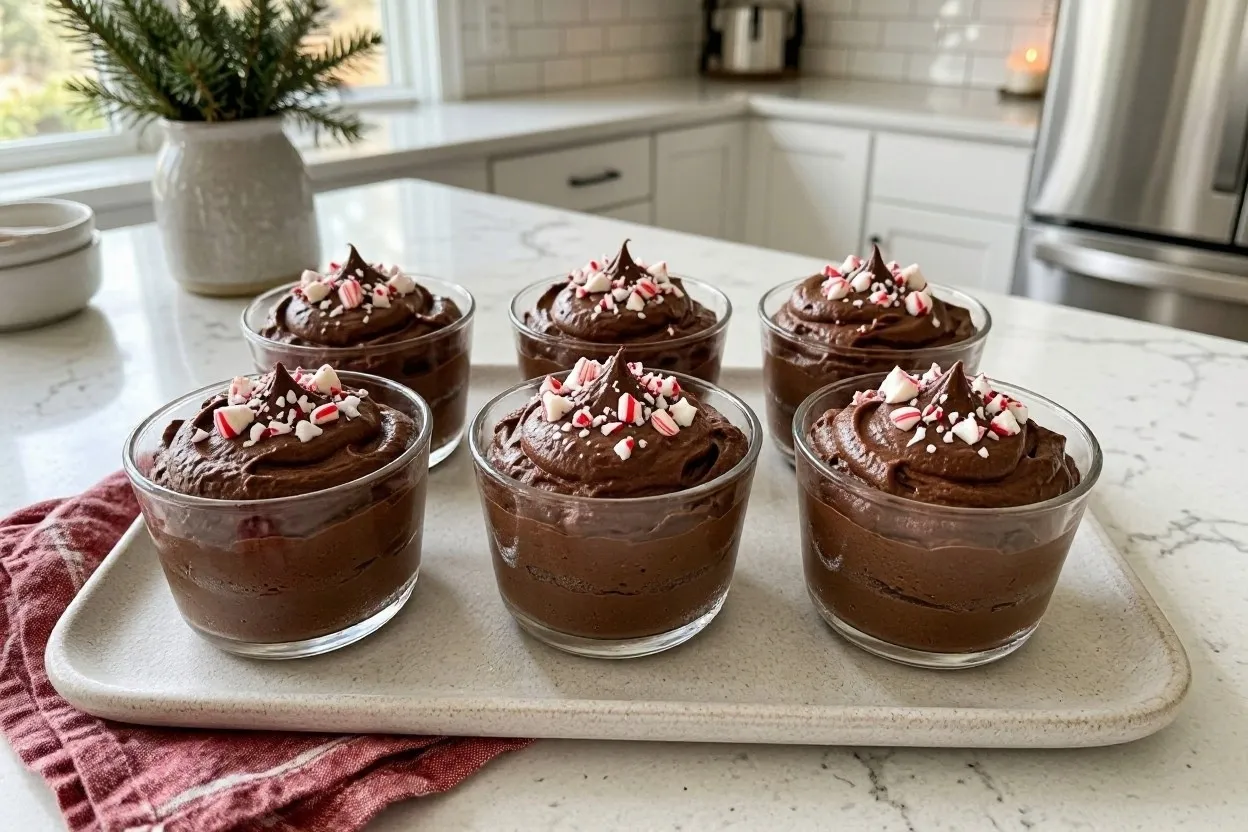
Chocolate Peppermint Mousse Cups
These chocolate peppermint mousse cups layer deep chocolate flavor with a cool peppermint finish. A smooth chocolate base is folded into softly whipped cream, creating an airy dessert that feels special without needing an oven.
Individual glasses make serving simple, especially when you are hosting a large Christmas gathering. Prepare the cups ahead, chill them until set, and add the peppermint topping just before they reach the table. If you prefer chilled treats, these simple christmas dessert recipes include an easy chocolate option that can be prepared well before Christmas Day. They are also a useful choice when your oven is occupied with the main meal.
Prep: 25 minutes | Cook: 0 minutes | Total: About 2 hours 30 minutes | Servings: 6 | Vegetarian, Make-Ahead
Ingredients
- 5 ounces semisweet chocolate, finely chopped
- 1 tablespoon unsalted butter
- 1/2 cup heavy whipping cream, for the chocolate mixture
- 1 1/4 cups cold heavy whipping cream, for whipping
- 2 tablespoons powdered sugar
- 1/4 teaspoon peppermint extract
- 1/2 teaspoon vanilla extract
- Pinch of fine salt
- 2 tablespoons crushed peppermint candies, for garnish
- Optional: 2 tablespoons chocolate shavings for serving
Instructions
- Divide the chopped chocolate and butter between a heatproof bowl and a small saucepan or microwave-safe bowl.
- Warm the 1/2 cup of heavy cream over medium-low heat until steaming around the edges. Do not let it boil.
- Pour the warm cream over the chopped chocolate and butter. Let stand for 2 minutes, then stir slowly from the center outward until the mixture is glossy and smooth.
- Set the chocolate mixture aside and allow it to cool to room temperature. It should remain soft and pourable, not hot or completely firm.
- Pour the remaining 1 1/4 cups cold cream into a chilled mixing bowl. Add the powdered sugar, peppermint extract, vanilla, and a small pinch of salt.
- Whip on medium speed until medium peaks form. The cream should hold its shape but still look smooth and soft. Avoid whipping until stiff or grainy.
- Stir one-third of the whipped cream into the cooled chocolate mixture to lighten it. Gently fold in the remaining whipped cream in two additions using a spatula.
- Divide the mousse evenly among six small glasses or ramekins. Smooth the tops or pipe the mousse into the glasses for a neater presentation.
- Cover each glass and refrigerate for at least 2 hours, or until the mousse is chilled and softly set.
- Sprinkle crushed peppermint candies and optional chocolate shavings over the mousse immediately before serving.
Make-Ahead and Storage Tips
Prepare the mousse up to 24 hours ahead and keep it covered in the refrigerator at 40°F or below. Add the crushed peppermint shortly before serving because moisture can make the candy sticky. Store leftovers covered for up to 2 days. Freezing is not recommended because thawing can change the texture of the whipped cream.
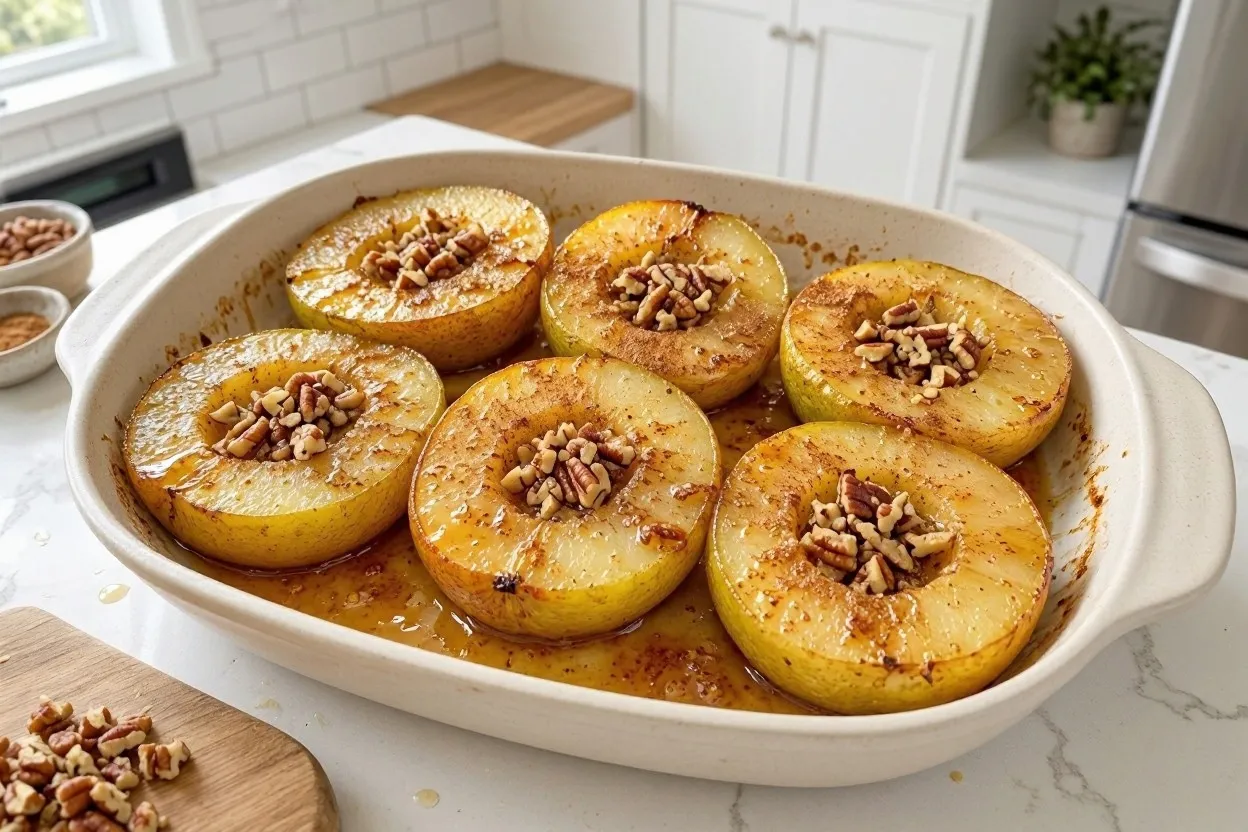
Cinnamon Baked Pears with Maple Syrup
These cinnamon baked pears are tender, naturally sweet, and finished with a maple-orange glaze and a crunchy pecan topping. A little ground ginger adds warmth, while fresh lemon juice keeps the fruit flavor bright rather than overly sweet.
When your oven is already busy with holiday cooking, this dessert is easy to fit into the schedule. The pears need only a few minutes of preparation before baking, and they can be served straight from the dish with their warm syrup. These simple christmas dessert recipes also include a lighter fruit-based option for guests who prefer naturally sweet desserts.
Prep: 10 minutes | Cook: 35 minutes | Total: About 45 minutes | Servings: 6 | Vegan, Gluten-Free*
Ingredients
- 3 firm but ripe pears, halved lengthwise and cored
- 2 tablespoons pure maple syrup
- 1 tablespoon melted coconut oil
- 1 tablespoon fresh orange juice
- 1 teaspoon fresh lemon juice
- 1 teaspoon ground cinnamon
- 1/4 teaspoon ground ginger
- 1/2 teaspoon vanilla extract
- Pinch of fine salt
- 1/4 cup chopped pecans
- 2 tablespoons old-fashioned rolled oats, certified gluten-free if needed
- 1 tablespoon finely chopped dried cranberries
Instructions
- Preheat the oven to 375°F. Lightly grease a baking dish large enough to hold the six pear halves in a single layer.
- Wash and dry the pears. Cut each pear lengthwise, remove the core with a small spoon, and trim a thin slice from the rounded underside of each half so it sits flat in the dish.
- Arrange the pear halves cut side up in the prepared baking dish.
- In a small bowl, whisk together the maple syrup, melted coconut oil, orange juice, lemon juice, cinnamon, ginger, vanilla, and salt.
- Brush the mixture over the cut surfaces of the pears, spooning a little into each hollowed center. Pour any remaining glaze into the bottom of the dish.
- Cover the dish loosely with foil and bake for 20 minutes.
- Meanwhile, combine the chopped pecans, rolled oats, and dried cranberries in a small bowl.
- Remove the foil and spoon some of the warm baking juices over the pears. Sprinkle the pecan mixture over the cut surfaces.
- Return the dish to the oven uncovered for another 12–15 minutes, until the pears are tender when pierced with a thin knife and the topping is lightly toasted.
- Let the pears rest for 5 minutes. Spoon the maple-orange syrup from the baking dish over the fruit and serve warm.
Make-Ahead and Storage Tips
You can prepare the maple-cinnamon glaze and chop the pecans a day ahead. For the best color and texture, cut the pears shortly before baking and brush them with lemon juice if you need to prepare them in advance. Refrigerate leftovers in a covered container for up to 3 days. Reheat in a 325°F oven until warmed through. Freezing is not recommended because thawed pears can become soft and watery.
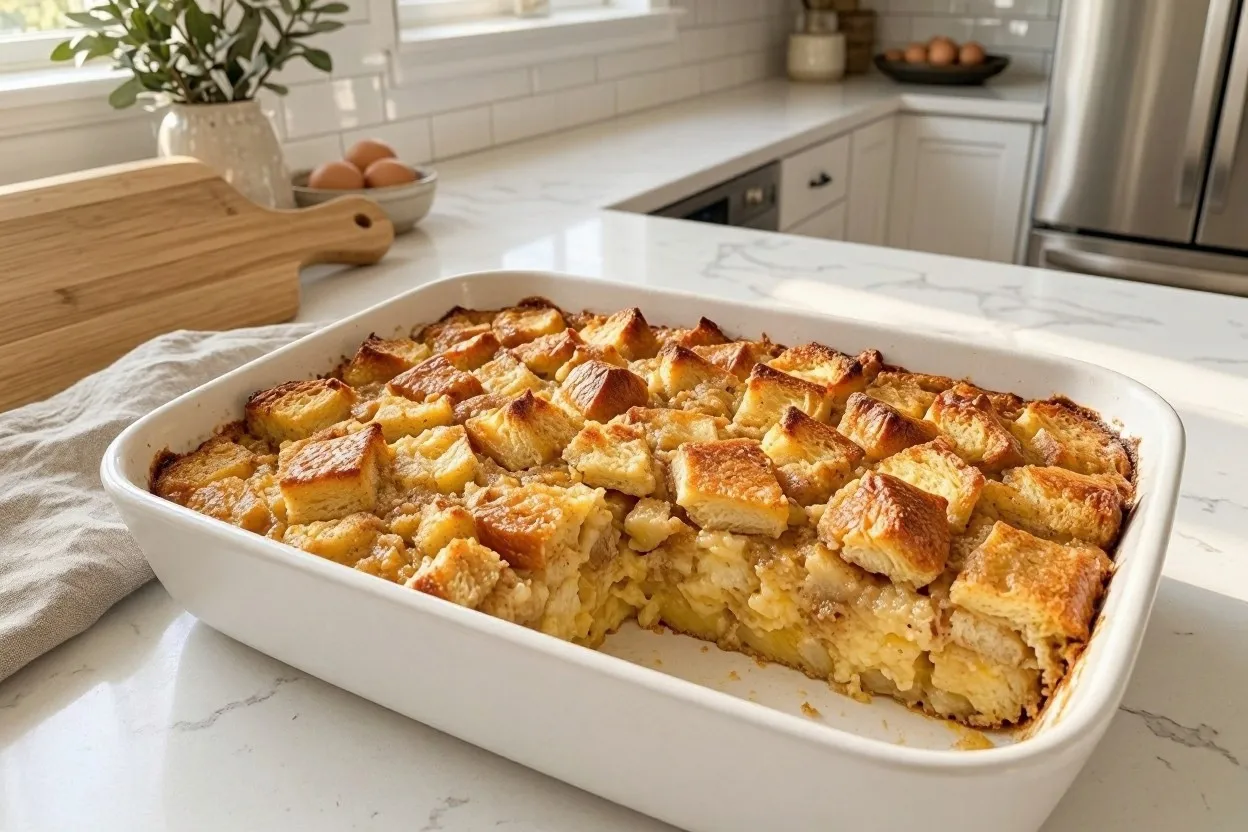
Eggnog Bread Pudding
This eggnog bread pudding turns day-old brioche into a soft, custardy Christmas dessert flavored with cinnamon, nutmeg, and vanilla. Small pieces of dried cranberries add a pleasant tart contrast to the creamy eggnog mixture, while the top bakes to a lightly golden finish.
It is a practical choice for a family gathering because you can assemble the dish ahead of time and refrigerate it overnight. Bake it while dinner is being served, then let it rest before bringing it to the table. This is one of those simple christmas dessert recipes that makes excellent use of everyday ingredients while delivering classic holiday flavors.
Prep: 15 minutes | Cook: 45–50 minutes | Total: About 1 hour 10 minutes, plus soaking | Servings: 8 | Vegetarian, Make-Ahead
Ingredients
- 8 cups day-old brioche or challah bread, cut into 1-inch cubes
- 2 cups prepared eggnog
- 2 large eggs
- 1 large egg yolk
- 1/4 cup packed light brown sugar
- 1 teaspoon vanilla extract
- 1 teaspoon ground cinnamon
- 1/4 teaspoon ground nutmeg
- Pinch of fine salt
- 1/3 cup dried cranberries
- 2 tablespoons unsalted butter, melted
- 1 tablespoon granulated sugar, for the top
Instructions
- Preheat the oven to 350°F. Lightly butter an 8-inch square baking dish or a similar 2-quart baking dish.
- Spread the bread cubes evenly in the prepared dish. Scatter the dried cranberries between the cubes so they are distributed throughout the pudding.
- In a large mixing bowl, whisk together the eggnog, eggs, egg yolk, brown sugar, vanilla, cinnamon, nutmeg, and salt until the sugar has dissolved and the mixture is smooth.
- Pour the eggnog custard slowly over the bread. Press the cubes gently with the back of a spoon so the bread absorbs the liquid.
- Let the mixture stand for 15–20 minutes. Press the bread down once more halfway through soaking to help the custard reach the lower pieces.
- Drizzle the melted butter over the top and sprinkle with the granulated sugar.
- Bake uncovered for 40–50 minutes. The top should be golden and the center should be set rather than liquid. Check the center with a food thermometer; it should reach 160°F for egg safety.
- If the top browns too quickly before the center is set, loosely cover the dish with foil for the remaining baking time.
- Remove from the oven and let the bread pudding rest for 10–15 minutes before serving. This allows the custard to settle and makes it easier to portion.
Make-Ahead and Storage Tips
Assemble the bread pudding the evening before, cover it, and refrigerate overnight at 40°F or below. Bake the following day, allowing a few extra minutes if the dish is still cold. Store baked leftovers in the refrigerator for up to 3 days. Reheat individual portions until they reach 165°F. Freeze cooled portions in airtight containers for up to 2 months and thaw overnight in the refrigerator before reheating.
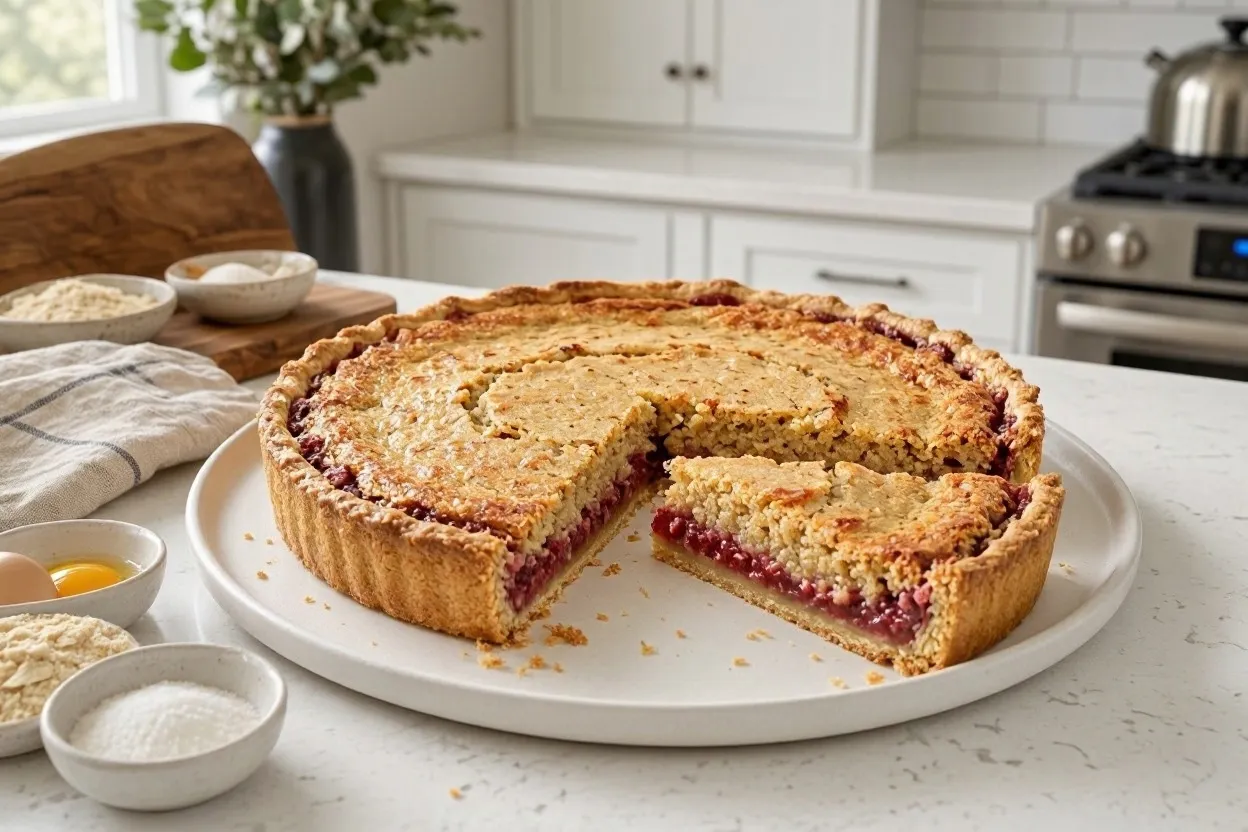
Raspberry Almond Tart
This raspberry almond tart pairs a crisp, buttery pastry shell with a layer of bright raspberry preserves and a soft almond filling. The almond mixture bakes into a tender, lightly golden center, while the fruit adds a sweet-tart note that balances the richness of the pastry.
It takes a little more preparation than the other desserts, but the tart can be baked the day before and sliced when guests are ready for dessert. Letting it cool completely also helps the filling set neatly for serving. For guests who enjoy elegant homemade pastries, these simple christmas dessert recipes offer a festive tart that can be prepared in advance.
Prep: 35 minutes | Cook: 40–45 minutes | Total: About 1 hour 55 minutes | Servings: 8 | Vegetarian
Ingredients
- For the pastry:
- 1 1/4 cups all-purpose flour
- 1/4 cup powdered sugar
- 1/4 teaspoon fine salt
- 7 tablespoons cold unsalted butter, cut into small cubes
- 1 large egg yolk
- 2 tablespoons ice-cold water, plus 1 teaspoon if needed
- For the filling:
- 1/2 cup raspberry preserves
- 6 tablespoons unsalted butter, softened
- 1/2 cup granulated sugar
- 1 cup finely ground almond flour
- 1 large egg, at room temperature
- 1/2 teaspoon almond extract
- 1 tablespoon all-purpose flour
- 1/4 teaspoon fine salt
- 1/3 cup fresh raspberries, optional, for decorating after baking
- 1 tablespoon sliced almonds, optional, for decorating
Instructions
- Preheat the oven to 375°F. Lightly grease a 9-inch tart pan with a removable bottom.
- Place the flour, powdered sugar, and salt in a food processor. Add the cold butter and pulse until the mixture resembles coarse crumbs with a few pea-sized pieces of butter remaining.
- Add the egg yolk and 2 tablespoons ice-cold water. Pulse just until the dough begins to clump. If it looks too dry, add the remaining teaspoon of water a little at a time.
- Turn the dough onto a clean surface and gently press it into a flat disc. Wrap and refrigerate for 20–30 minutes.
- Roll the chilled dough on a lightly floured surface into a circle large enough to fit the tart pan. Carefully transfer it to the pan, press it into the edges, and trim away excess dough.
- Prick the base several times with a fork. Line the shell with parchment paper and fill with pie weights or dry beans. Bake for 15 minutes.
- Carefully remove the parchment and weights. Return the shell to the oven for another 5 minutes, until the base looks dry. Let it cool slightly.
- Spread the raspberry preserves in a thin, even layer over the warm pastry base.
- For the almond filling, beat the softened butter and granulated sugar in a bowl for about 2 minutes until creamy. Add the egg and almond extract and mix until combined.
- Stir in the almond flour, all-purpose flour, and salt. Mix just until a thick, smooth filling forms.
- Spoon the almond filling over the raspberry layer and spread gently to cover it. Leave a little room at the top because the filling will rise slightly as it bakes.
- Bake for 25–30 minutes, until the almond filling is golden and the center feels set when lightly touched. If the edges brown too quickly, cover them loosely with strips of foil.
- Cool the tart completely in the pan before removing the outer ring. Decorate with fresh raspberries and sliced almonds if desired, then cut into slices.
Make-Ahead and Storage Tips
Bake the tart one day before serving and let it cool completely. Cover and refrigerate for up to 4 days. Bring slices toward room temperature before serving. Freeze the cooled tart, well wrapped, for up to 2 months. Thaw overnight in the refrigerator. Avoid cutting the tart while warm because the almond filling needs time to firm up.
How Much Christmas Dessert Do You Need?
When you’re planning a holiday menu, dessert portions depend on the number of guests, the richness of the meal, and how many sweets you plan to serve. If you’re offering one main dessert, prepare a full portion for each guest. With a dessert assortment, smaller portions are usually enough. Planning the quantities in advance makes it easier to select the right desserts for your Christmas gathering.
- Cake: Plan on one regular slice per person.
- Mousse: Allow one small dessert cup per guest.
- Baked pears: Serve one pear half per person.
- Bread pudding: Plan on one medium square per person.
- Tart: Cut into eight equal slices for eight guests.
Worked Example for 12 Guests
Suppose you’re serving three different desserts after Christmas dinner. You could prepare:
- One cranberry orange cake, cut into 10 slices, plus two smaller shared portions from an additional dessert.
- One batch of chocolate mousse, doubled to make 12 individual cups.
- Two batches of baked pears, giving each guest one half.
This approach gives guests a choice without requiring a full serving of every dessert. If your guests are enthusiastic about sweets, increase the quantities slightly or add a separate tray of small portions. It is an easy way to make these simple christmas dessert recipes work for a larger gathering.
Christmas Dessert Make-Ahead Plan
A little scheduling makes holiday baking easier, especially when your oven and refrigerator are already being used for dinner. These five simple christmas dessert recipes can be divided between advance preparation and the final hours before serving. Preparing a few components early leaves you more time to enjoy Christmas with your family and friends. A clear schedule also helps you avoid rushing through several baking projects at once.
The Day Before Christmas
- Cranberry orange cake: Bake, cool completely, cover, and refrigerate.
- Chocolate mousse: Prepare the mousse and divide it into individual glasses. Refrigerate covered.
- Eggnog bread pudding: Assemble the bread and custard mixture, cover, and refrigerate overnight.
- Raspberry almond tart: Bake completely, cool, and refrigerate.
- Baked pears: Prepare the maple-cinnamon mixture and measure the ingredients. Keep the pears whole until closer to baking time.
The Last Two Hours
- 120 minutes before dessert: Preheat the oven and bake the eggnog bread pudding if it is not already cooked.
- 90 minutes before dessert: Prepare and bake the pears, allowing time for the fruit to become tender.
- 60 minutes before dessert: Check the cake and tart, arrange serving plates, and organize dessert utensils.
- 30 minutes before dessert: Remove the cake and tart from the refrigerator if you prefer them closer to room temperature. Keep mousse refrigerated.
- 10 minutes before dessert: Add crushed peppermint to the mousse and arrange the warm desserts on their serving dishes.
Use separate serving utensils for each dessert. Keep chilled mousse refrigerated until guests are ready to eat, rather than leaving every dish on the counter at once. Following this plan makes preparing simple christmas dessert recipes more manageable when you have a full holiday menu to organize.
Planning simple christmas dessert recipes in advance also gives you more flexibility if your oven is needed for the main meal. Choose the recipes that can be chilled or stored ahead, then leave only the final baking and decorating tasks for Christmas Day.
Serving Christmas Desserts and Keeping Food Safe
Holiday desserts often contain dairy, eggs, and other ingredients that need careful temperature control. A beautiful dessert table should also be a safe one, particularly when food is served over several hours.
- Perishable food should not stay out more than 2 hours, or 1 hour above 90°F.
- Keep hot food held at 140°F or above.
- Keep cold food at 40°F or below.
- Reheated leftovers should reach 165°F.
- Refrigerate mousse and other dairy-based desserts promptly after serving.
- Use clean serving spoons and avoid returning used utensils to shared dessert dishes.
- Store leftovers in shallow, covered containers so they cool more quickly.
For more guidance about safe preparation, storage, and handling, consult the USDA Food Safety and Inspection Service.
Food Allergies and Dietary Considerations
When you’re hosting a Christmas gathering, it’s helpful to know which common allergens are present in each dessert. Keep the original ingredient packaging available and tell guests about possible cross-contact.
- Dairy: The cake, mousse, bread pudding, and tart contain butter or cream. The baked pears use coconut oil instead of dairy butter.
- Eggs: The cake, mousse, bread pudding, and tart contain eggs or egg-based ingredients. The pear recipe does not.
- Wheat: The cake, bread pudding, and tart contain wheat. The mousse and pear recipes do not contain wheat ingredients as written.
- Tree nuts: The baked pears contain pecans, while the raspberry tart contains almond flour and almond extract. Check labels for cross-contact.
- Peanuts: None of the five recipes intentionally contains peanuts, but check packaged chocolate, preserves, and other products for cross-contact warnings.
- Shellfish and fish: These recipes do not intentionally contain shellfish or fish. Check product labels if allergies are severe.
- Soy: Check chocolate, butter substitutes, and packaged products for soy-derived ingredients or cross-contact.
- Sesame: Sesame is not an intentional ingredient in these recipes, but packaged ingredients may carry cross-contact warnings.
Use separate utensils, cutting boards, mixing bowls, and serving dishes when preparing food for guests with allergies. Do not assume that removing a topping makes a dessert safe if the rest of the dish has been exposed to an allergen. When in doubt, check every package and ask the guest about their specific needs before serving.
More Recipes You’ll Love
Planning the rest of your Christmas menu? These LifeTrusty guides offer more ideas for holiday meals and entertaining:
- Easy Christmas cookies for your holiday baking tray.
- No-bake Christmas sweets when oven space is limited.
- Modern Christmas dinner ideas for a complete holiday menu.
Simple Christmas Dessert Recipes: Frequently Asked Questions
What are the easiest desserts to make for Christmas?
Chocolate peppermint mousse cups and cinnamon baked pears are two straightforward options. The mousse requires no oven and can be prepared ahead, while the pears need only a few minutes of preparation before baking. Both offer a simple alternative to elaborate holiday cakes. They are excellent choices if you want simple christmas dessert recipes that save time during a busy holiday celebration.
Can I prepare Christmas desserts the day before?
Yes. The cranberry orange cake, chocolate mousse, eggnog bread pudding, and raspberry almond tart can all be prepared ahead. Store them covered in the refrigerator as directed. For the best texture, bake the cinnamon pears closer to serving time. Preparing these desserts in advance also makes it easier to organize your holiday cooking schedule.
How many desserts should I serve for 12 Christmas guests?
For 12 guests, two or three different desserts usually provide a nice selection. Consider making 12 mousse cups, one cake, or enough baked pears for everyone. Smaller portions work especially well when dessert follows a large Christmas dinner.
How long can homemade Christmas desserts stay refrigerated?
Storage times depend on the ingredients. The mousse is best within 2 days, while the cake, tart, bread pudding, and baked pears generally keep for 3–4 days when properly covered and refrigerated. Keep perishable desserts at 40°F or below.
Can I make these Christmas desserts without an oven?
The chocolate peppermint mousse cups are the only completely oven-free recipe in this collection. The other desserts require baking. If your oven is occupied with holiday dinner, prepare the mousse ahead and schedule the baked desserts around the available oven time.
How can I offer Christmas desserts to guests with different dietary needs?
Serve the cinnamon baked pears as a vegan and gluten-free option, provided the ingredients and preparation surfaces are free from relevant cross-contact. Clearly label the other desserts for dairy, egg, wheat, and nut ingredients, and confirm individual allergy requirements with guests.
If you are choosing simple christmas dessert recipes for a holiday party, consider preparing a mix of warm and chilled options. That gives guests different flavors and textures while making it easier to prepare most of the menu ahead of time.
Final Thoughts on Simple Christmas Dessert Recipes
A Christmas dessert menu doesn’t need five complicated baking projects to feel special. A colorful cranberry cake, chilled chocolate mousse, warm cinnamon pears, comforting eggnog bread pudding, and a fruit-filled almond tart give you different flavors and textures to share around the table.
These simple christmas dessert recipes make it easier to plan a festive menu without spending the entire holiday in the kitchen. Choose the recipes that fit your guest list and preparation time. Make the desserts that refrigerate well ahead of the celebration, then leave the final hours for warming, arranging, and enjoying the holiday with your guests.
With these simple christmas dessert recipes, you can create a memorable Christmas dessert table without complicated baking techniques. Whether you choose one favorite or prepare several options, a little planning will help you enjoy the celebration as much as your guests.
Save these simple christmas dessert recipes for your next holiday celebration and enjoy homemade treats with less effort. You can also share this collection with friends and family who are planning their Christmas menus.
Save or pin this collection for your Christmas menu planning, and tell us in the comments which dessert you’d serve first!This article follows our editorial and sourcing standards. Recipes are for informational purposes only — see our Disclaimer.
Looking for kitchen inspiration? Our partner programs bundle recipe collections, meal planners, and shopping lists — for everyday meals at home.
Browse more recipesSponsored · Prices may change