12 min read
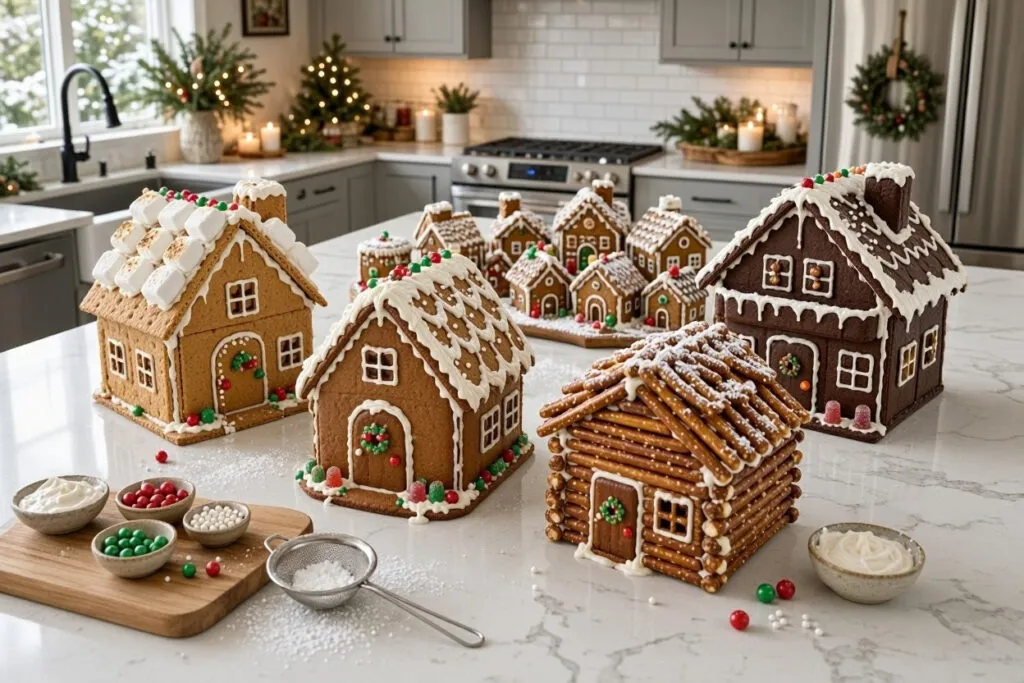
A kitchen counter covered with gingerbread cookies, bowls of colorful candy, and a little icing is the start of a memorable holiday afternoon. These gingerbread house ideas give you five different ways to build a festive display, from a traditional cookie house to a chocolate-covered chalet and a tiny holiday village.
You can choose a project based on your time, decorating supplies, and baking experience. Some of these gingerbread house ideas use homemade cookie panels, while others make construction easier with graham crackers or pretzels.

- Quick Look at These Gingerbread House Ideas
- Classic Gingerbread House
- Graham Cracker Gingerbread Cottage
- Chocolate Gingerbread Chalet
- Pretzel Gingerbread Log Cabin
- Mini Gingerbread Village
- How to Plan Your Gingerbread House Display
- Make-Ahead Decorating Schedule
- Storage and Food Safety
- Allergy and Decorating Safety
- Gingerbread House Ideas: Frequently Asked Questions
- Final Thoughts on Gingerbread House Ideas
Quick Look at These Gingerbread House Ideas
Before choosing a project, compare the construction style and estimated time. These gingerbread house ideas range from a traditional baked-cookie project to simple no-bake cracker and pretzel designs.
| Project | Estimated Time | Yield | Method | Make Ahead |
|---|---|---|---|---|
| Classic Gingerbread House | 2–3 hours, plus cooling | 1 house | Baked cookies | Yes |
| Graham Cracker Cottage | 45–60 minutes | 1 cottage | No-bake | Yes |
| Chocolate Gingerbread Chalet | 2–3 hours, plus cooling | 1 chalet | Baked cookies | Yes |
| Pretzel Log Cabin | 45–60 minutes | 1 cabin | No-bake | Yes |
| Mini Gingerbread Village | 1–2 hours | 5 mini houses | Mixed | Yes |
Classic Gingerbread House
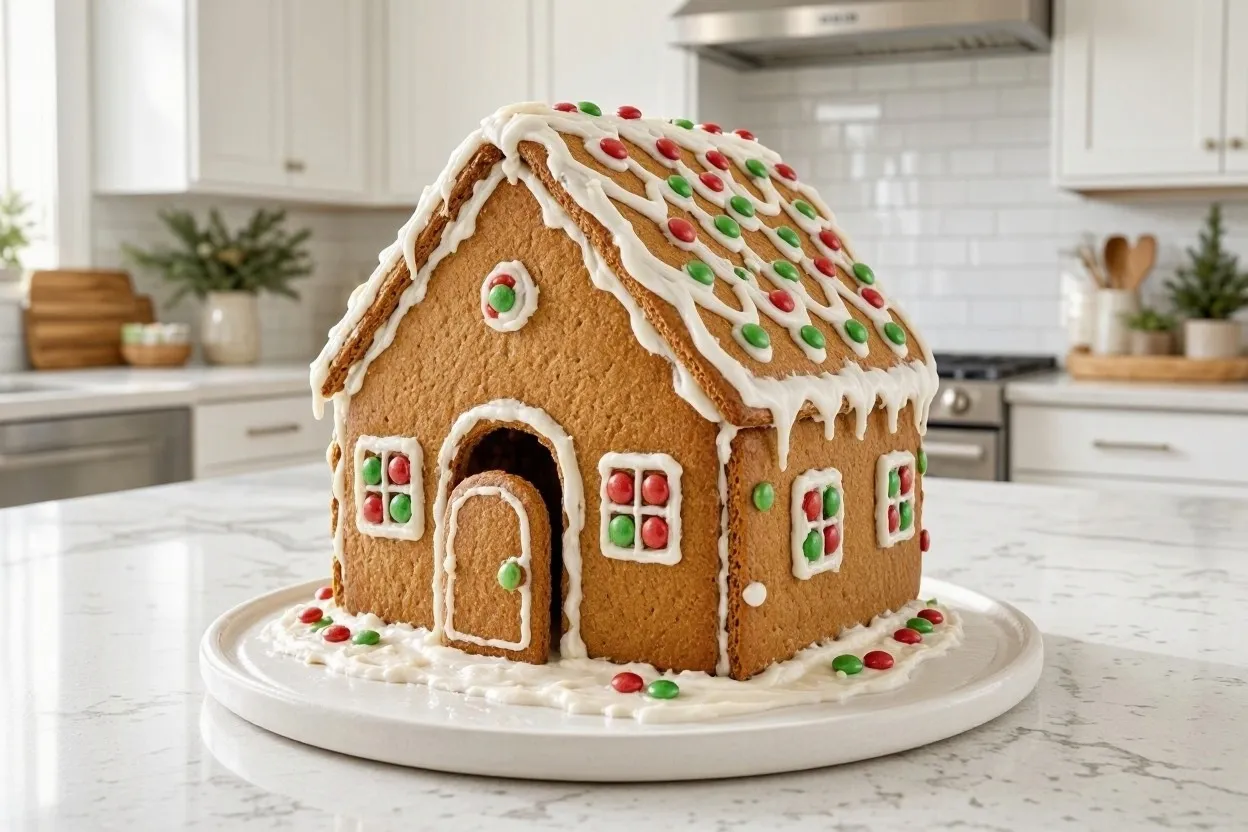
A classic gingerbread house is the traditional centerpiece for a Christmas decorating afternoon. Its sturdy cookie walls, peaked roof, and white icing details create the familiar holiday look. Among these gingerbread house ideas, this one gives you the most freedom to customize the shape and decorations.
Prep time: 45 minutes | Cook time: 12–15 minutes per batch | Total time: About 2–3 hours, plus cooling | Yield: 1 house
Ingredients
- 3 cups all-purpose flour, plus more for rolling
- 1 tablespoon ground ginger
- 2 teaspoons ground cinnamon
- 1/2 teaspoon ground cloves
- 1/2 teaspoon baking soda
- 1/4 teaspoon salt
- 3/4 cup unsalted butter, softened
- 3/4 cup packed brown sugar
- 1/2 cup molasses
- 1 large egg
- 1 teaspoon vanilla extract
- 4 cups powdered sugar for royal icing
- 3 tablespoons meringue powder
- 6 tablespoons water, plus more as needed
- Assorted hard candies, gumdrops, and decorating candies
Instructions
- Whisk the flour, ginger, cinnamon, cloves, baking soda, and salt in a medium bowl.
- Beat the butter and brown sugar until creamy. Mix in the molasses, egg, and vanilla.
- Add the dry ingredients gradually. Mix until a firm dough forms. Divide into two portions, wrap, and chill for at least 1 hour.
- Heat the oven to 350°F. Roll the dough on parchment to about 1/4-inch thickness.
- Use paper templates to cut two side walls, a front and back wall, and two roof panels. Keep the edges straight and transfer the parchment to baking sheets.
- Bake for 12–15 minutes, or until the panels look firm and the edges are slightly darker. Cool completely on the baking sheets.
- Beat the powdered sugar, meringue powder, and water until thick, glossy royal icing forms. Add water a few drops at a time if it is too stiff.
- Pipe icing along the edges and assemble the walls. Hold each panel in place until the icing begins to set. Let the structure stand until firm before adding the roof.
- Decorate with more royal icing and candies. Allow the finished house to dry completely before moving it.
Make-Ahead and Storage Tips
Bake the cookie panels up to several days ahead and store them in an airtight container in a cool, dry place. Assemble the structure when the panels are completely cool. Keep the finished display away from humidity and direct sunlight.
Graham Cracker Gingerbread Cottage
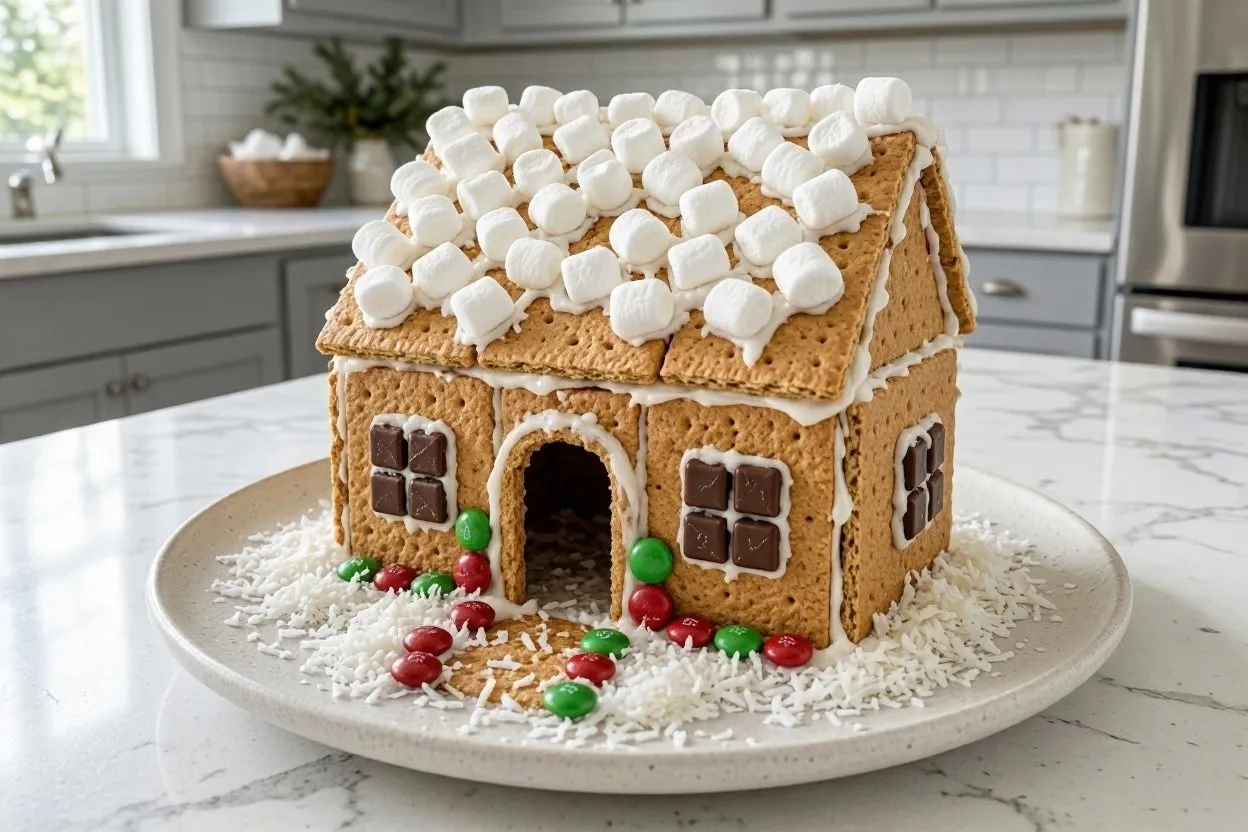
If you want a quicker decorating activity, a graham cracker cottage is a practical choice. It skips the dough mixing, rolling, and baking, making it one of the easiest gingerbread house ideas for families with young decorators or guests who prefer a shorter project.
Prep time: 30 minutes | Cook time: None | Total time: 45–60 minutes | Yield: 1 cottage
Ingredients
- 12 full graham cracker sheets
- 3 cups powdered sugar
- 2 tablespoons meringue powder
- 4–5 tablespoons water, as needed
- Gumdrops
- Mini marshmallows
- Small round candies
- Decorating sprinkles
Instructions
- Break or cut the graham crackers carefully to create two side walls, a front wall, a back wall, and two roof panels.
- Whisk the powdered sugar and meringue powder together. Add water gradually and beat until the icing is thick enough to hold its shape.
- Pipe a generous line of icing along the bottom and side edges of the front and back panels.
- Attach the side walls and hold them in place until the icing begins to set. Add extra icing inside the corners for support.
- Wait until the walls feel stable before attaching the roof panels.
- Decorate the cottage with gumdrops, marshmallows, and sprinkles. Leave it undisturbed until the icing is firm.
Make-Ahead and Storage Tips
Prepare the cracker pieces and decorations ahead of time, but assemble the cottage close to your decorating session. Store unused crackers in their original sealed packaging so they remain crisp.
Chocolate Gingerbread Chalet
A chocolate gingerbread chalet gives the traditional cookie house a deeper color and a slightly different holiday look. Chocolate-flavored cookie panels pair well with white icing, peppermint pieces, and simple candy decorations. This design is a lovely option when you want gingerbread house ideas with a cozy mountain-cabin appearance.
Prep time: 45 minutes | Cook time: 12–15 minutes per batch | Total time: About 2–3 hours, plus cooling | Yield: 1 chalet
Ingredients
- 2 1/2 cups all-purpose flour
- 1/2 cup unsweetened cocoa powder
- 1 tablespoon ground ginger
- 1 teaspoon ground cinnamon
- 1/2 teaspoon baking soda
- 1/4 teaspoon salt
- 3/4 cup unsalted butter, softened
- 3/4 cup packed brown sugar
- 1/2 cup molasses
- 1 large egg
- 1 teaspoon vanilla extract
- 4 cups powdered sugar
- 3 tablespoons meringue powder
- 6 tablespoons water, plus more as needed
- White chocolate pieces and assorted candies for decorating
Instructions
- Whisk the flour, cocoa powder, ginger, cinnamon, baking soda, and salt.
- Beat the butter and brown sugar until creamy. Add the molasses, egg, and vanilla.
- Gradually mix in the dry ingredients until a firm dough forms. Wrap and chill for at least 1 hour.
- Heat the oven to 350°F. Roll the dough to about 1/4-inch thickness on parchment paper.
- Cut the front, back, side, and roof panels using paper templates. Keep the panel dimensions consistent.
- Bake for 12–15 minutes, checking that the panels are firm. Cool completely before assembly.
- Beat the powdered sugar, meringue powder, and water into a thick royal icing.
- Pipe icing along the wall edges and assemble the chalet. Allow the walls to set before adding the roof.
- Finish with white icing, white chocolate pieces, and candies. Let the decorations dry before moving the house.
Make-Ahead and Storage Tips
The chocolate cookie panels can be baked ahead and stored in an airtight container in a dry place. Assemble only when the panels are cool. Keep the completed chalet away from warm windows and damp areas.

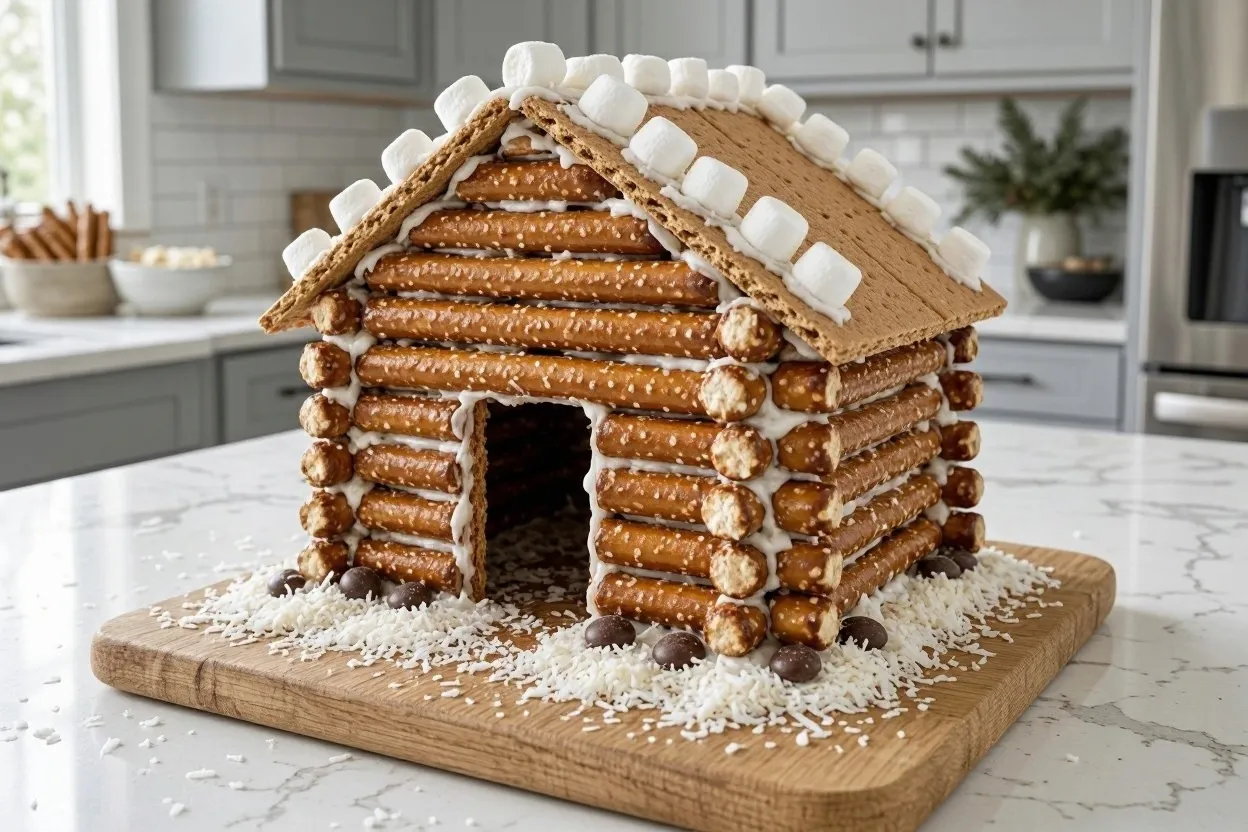
Pretzel Gingerbread Log Cabin
Pretzel rods create the look of stacked logs and give this cabin a different texture from a traditional cookie house. It is a no-bake decorating project, so you can focus on building and arranging the pretzels rather than preparing dough. Add this design to your gingerbread house ideas when you want a rustic cabin theme.
Prep time: 35 minutes | Cook time: None | Total time: 45–60 minutes | Yield: 1 small cabin
Ingredients
- 24 pretzel rods, plus extra for trimming if needed
- 2 cups powdered sugar
- 2 tablespoons meringue powder
- 3–4 tablespoons water, as needed
- Mini pretzels for details
- Small candies for windows and decorations
- Shredded coconut for a snowy base, optional
Instructions
- Prepare a sturdy serving board or flat cake board as the base.
- Mix the powdered sugar, meringue powder, and water until a thick royal icing forms.
- Pipe icing onto the board to outline the cabin footprint.
- Arrange pretzel rods horizontally along the sides, adding a thin line of icing between layers to hold them together.
- Leave spaces for a door and windows if desired. Trim pretzels carefully to keep the ends aligned.
- Build the front and back gables with shorter pretzel pieces, using icing to secure the joints.
- Arrange pretzel rods across the top to create a simple roof. Support the roof while the icing dries.
- Add mini pretzels and candies for details. Sprinkle coconut around the base if you want a snowy effect.
Make-Ahead and Storage Tips
Prepare the decorations and serving board in advance. Assemble the cabin in a dry room and allow the icing to set before transporting it. Pretzels can soften when exposed to humidity, so keep the display in a cool, dry place.
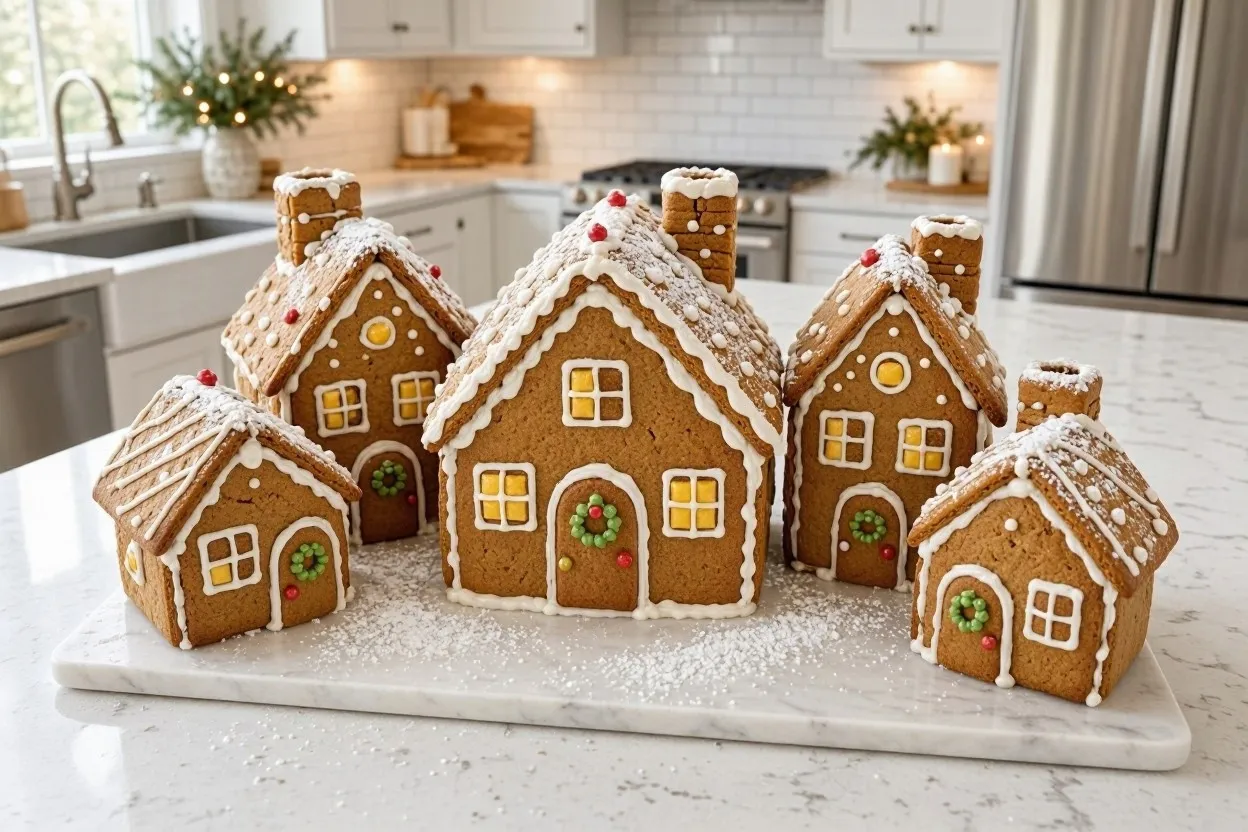
Mini Gingerbread Village
A mini gingerbread village turns one decorating project into a collection of small houses. Each guest can decorate a different building, or you can arrange several little cottages together on one serving board. These gingerbread house ideas work especially well for a holiday table centerpiece or a group decorating activity.
Prep time: 45 minutes | Cook time: 12–15 minutes per batch | Total time: 1–2 hours, plus cooling | Yield: 5 mini houses
Ingredients
- 2 cups all-purpose flour
- 1 teaspoon ground ginger
- 1 teaspoon ground cinnamon
- 1/4 teaspoon baking soda
- 1/4 teaspoon salt
- 1/2 cup unsalted butter, softened
- 1/2 cup packed brown sugar
- 1/4 cup molasses
- 1 small egg
- 1/2 teaspoon vanilla extract
- 3 cups powdered sugar
- 2 tablespoons meringue powder
- 4–5 tablespoons water, as needed
- Small candies and sprinkles for decorating
Instructions
- Whisk the flour, ginger, cinnamon, baking soda, and salt in a bowl.
- Beat the butter and brown sugar until creamy. Mix in the molasses, egg, and vanilla.
- Add the dry ingredients and mix until a firm dough forms. Chill for at least 1 hour.
- Heat the oven to 350°F. Roll the dough to about 1/4-inch thickness between sheets of parchment.
- Cut small matching wall and roof pieces for five mini houses. Keep the pieces small and consistent so they are easier to assemble.
- Bake for 12–15 minutes, or until firm. Cool completely before handling.
- Beat the powdered sugar, meringue powder, and water until thick royal icing forms.
- Assemble each mini house with icing. Let the walls set before adding the roof.
- Decorate each house with a different candy color or pattern. Arrange the finished houses together on a board.
Make-Ahead and Storage Tips
Bake the small cookie pieces ahead and store them in an airtight container. Keep the icing covered between decorating sessions so it does not dry out. Let each finished house set before placing it next to the others.
How to Plan Your Gingerbread House Display
Once you have chosen your favorite gingerbread house ideas, decide where the finished houses will be displayed. A large board, tray, or flat cake stand gives you room to arrange the buildings without crowding them.
- For 4–6 guests: Prepare one large house or several smaller decorating projects.
- For 8–10 guests: Set up two or three decorating stations with separate icing bags and candy bowls.
- For 12 guests: Prepare a mini village activity or several graham cracker cottages so everyone has a chance to decorate.
- For a centerpiece: Place the tallest house toward the back and smaller houses in front.
For example, if you are hosting 12 people, prepare five mini houses and several additional cracker cottages. Divide the guests into small groups, and provide each group with icing, candies, and a tray for their project.
Make-Ahead Decorating Schedule
The Day Before
- Bake the cookie panels for the classic and chocolate houses.
- Cut and sort graham crackers and pretzels.
- Prepare candy bowls and decorating supplies.
- Choose a stable board or tray for the finished display.
The Last Two Hours
- Set out the panels, crackers, pretzels, icing, and decorations.
- Assemble the larger structures first so they have time to set.
- Decorate the smaller cottages and mini houses.
- Move the finished pieces carefully to the display area.
Storage and Food Safety
Keep decorating ingredients covered and use clean utensils. If you plan to eat the finished treats, follow safe food-handling practices and avoid placing edible decorations near non-food craft materials.
- Perishable food should not stay at room temperature for more than 2 hours, or 1 hour when the temperature is above 90°F.
- Keep hot foods at 140°F or above.
- Keep cold foods at 40°F or below.
- Reheat leftovers to 165°F.
For more information, review the USDA food safety guidance.
Allergy and Decorating Safety
Check the labels on crackers, candies, chocolate, and decorating products before setting up your activity. Depending on the products you choose, these projects may contain wheat, dairy, eggs, soy, peanuts, tree nuts, or sesame. Meringue powder and some candies may also contain additional ingredients that require attention.
- Keep ingredient packages available so guests can check allergen information.
- Use separate bowls and utensils for different decorations.
- Do not assume that candy or chocolate is free from cross-contact with nuts or other allergens.
- For young children, supervise decorating and watch for hard candies and other small pieces that may present a choking risk.
More Christmas Recipes You’ll Love
- Easy Christmas cookie recipes for a holiday baking afternoon.
- No-bake Christmas desserts for a crowd when you need another simple sweet treat.
- Festive Christmas recipes for planning a holiday menu.
Gingerbread House Ideas: Frequently Asked Questions
What is the easiest way to make a gingerbread house?
Graham crackers are one of the easiest materials for a simple house because you do not need to prepare or bake cookie dough. Use thick royal icing as the edible glue, assemble the walls first, and let them set before attaching the roof.
How do you keep a gingerbread house from falling apart?
Use firm cookie panels, thick royal icing, and a flat base. Let the walls set before adding the roof, and avoid moving the structure while the icing is still soft. Supporting the walls temporarily can also help during assembly.
Can you make gingerbread house pieces ahead of time?
Yes. Bake the cookie panels ahead and store them in an airtight container in a cool, dry place. You can also sort candies and prepare templates in advance. Assemble the house only after the panels have cooled completely.
What candy works best for decorating a gingerbread house?
Small gumdrops, hard candies, mini marshmallows, sprinkles, and chocolate pieces are common choices. Choose decorations that fit the size of your house and check their ingredient labels for allergens before serving.
How long does a decorated gingerbread house last?
A display-only house can remain attractive for several days when kept in a cool, dry place away from direct sunlight and humidity. If you intend to eat it, follow the storage directions for the individual ingredients and avoid consuming decorations that have been exposed to dust or handling.
Can children decorate gingerbread houses?
Yes. Choose a simple cracker cottage or mini-house project for younger children. Prepare the pieces and icing in advance, supervise the use of small candies, and provide separate decorating supplies so everyone has room to work.
Final Thoughts on Gingerbread House Ideas
From a traditional cookie house to a pretzel cabin or a collection of tiny cottages, these gingerbread house ideas give you several ways to make a festive holiday display. Choose the project that fits your time, supplies, and decorating plans.
Prepare the pieces ahead, keep the icing thick, and give each structure enough time to set. Save this guide for your next holiday decorating day, and share which house you would build first.
This article follows our editorial and sourcing standards. Recipes are for informational purposes only — see our Disclaimer.
Looking for kitchen inspiration? Our partner programs bundle recipe collections, meal planners, and shopping lists — for everyday meals at home.
Browse more recipesSponsored · Prices may change